- New
Check Out Our New VarietiesX
-
Fall-Planted Bulbs
Fall Planting for Spring Blooms X
-
Spring-Planted Bulbs
Spring Planting for Summer Blooms X
-
Sun Perennials
Create Brilliant Borders with Sun-Loving Plants X
-
Shade Perennials
Brighten Up Shady Spots with Much Needed ColourX
- Super Sak®
- Garden Essentials

Shopping Cart |
0 items in cart |
|---|

 800-644-5505
Tips and Growing Instructions: Iris
In early fall, plant your Dutch Iris (Iris Xiphium) bulbs 8-10 cm deep and 3-4" apart in light, fertile, well-drained soil. Dutch Iris prefer bright, sunny locations but can live in partial shade. If you have clay-heavy soil, add some coarse sand and humus. Irises enjoy a low-nitrogen fertilizer. Set the bulb firmly to hold the plant in place. Make sure the bulb is near the surface. Firm the soil tightly and allow enough for settling to keep the bulbs above any possible standing water. The top of the bulb should be just beneath the surface of the soil. If you have several plants, plant them at least 45 cm apart, "facing" the same way.

Japanese Iris prefer bright, sunny locations but can live in partial shade. They require high soil moisture and a fair amount of feeding throughout their growth period. Space plants 60 cm or more apart in heavy soil amended with compost and peat. No lime! Wait until you see new growth before fertilizing, then feed again just before bloom. Japanese Iris are also a favorite water plant grown in containers in pond shallows.
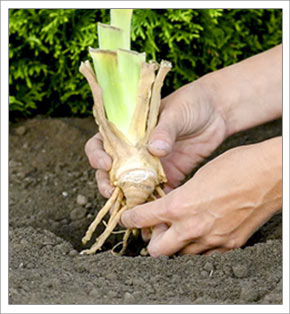
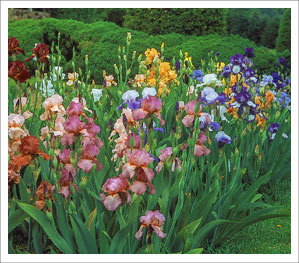
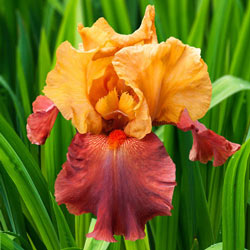
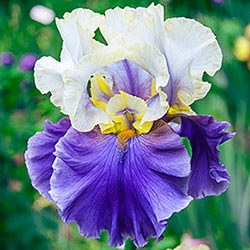
The best time to plant bearded iris is July through September. This allows enough time for the flowers to become established before winter. In a well-cultivated bed, dig a shallow hole large enough for the rhizome clump. Create a mound of soil in the center of the hole. Make sure the mound is high enough to allow the top of the rhizome to poke out slightly above the soil level. Spread the roots around the mound, fill it with soil and water. For a colorful group planting, plant at least three rhizomes (about 20-25 cm apart) or plant undivided clumps. Be sure to point each fan of leaves away from the center of the group. Before flowering, water plants often enough to keep the soil moist but not soaked. Apply mulch to fall-planted irises to reduce winter heaving.
Over time iris clumps become crowded and the blooms may suffer. But it is easy to spread out your irises and encourage new growth. In late summer, carefully lift the entire clump with a garden fork. Cut apart the new, younger sections from the original center rhizome, then replant. You may want to let the rhizomes dry in the sun for a day before replanting. Unless you see new buds coming off the center rhizome, discard it -- it is past its prime and unlikely to bloom a second time. The "babies" are what you want to save.
 Although bearded iris don't need a lot, a
small serving of specially-designed Iris Fertilizer can make your display
grow even stronger and healthier. Breck's® Iris Lovers All-Natural Iris Food uses a 4-4-2 ratio of nitrogen,
phosphorus and potassium, respectively. Our iris food is well-balanced, so your irises won't be over- or underfed. Nitrogen is vital for healthy
growing, but too much can cause soft, disease-prone growth. A small dose of phosphorus is useful when producing flowers and
developing roots, and some potassium helps bring out those rich, vibrant colours that make iris so lovely. Our iris fertilizer has less phosphorus and potassium
than our other fertilizers, and just enough of all three key nutrients to give your bearded beauties the boost they deserve!
Although bearded iris don't need a lot, a
small serving of specially-designed Iris Fertilizer can make your display
grow even stronger and healthier. Breck's® Iris Lovers All-Natural Iris Food uses a 4-4-2 ratio of nitrogen,
phosphorus and potassium, respectively. Our iris food is well-balanced, so your irises won't be over- or underfed. Nitrogen is vital for healthy
growing, but too much can cause soft, disease-prone growth. A small dose of phosphorus is useful when producing flowers and
developing roots, and some potassium helps bring out those rich, vibrant colours that make iris so lovely. Our iris fertilizer has less phosphorus and potassium
than our other fertilizers, and just enough of all three key nutrients to give your bearded beauties the boost they deserve!
You May Also Like...
Hyacinths Back to Index Tips and Growing Intructions:
Lilies
Have another question? Return to the Customer Service Help page or send an e-mail directly to Customer Service.


 Copyright © 2024 Breck's LTD. All Rights Reserved.
 Breck's trademarks are registered trademarks of Breck's LLC.
This site is protected by reCAPTCHA and Google Privacy Policy and Terms apply.